Your first GPathFinder calculation
Objectives
This tutorial aims at providing an overview of a typical workflow when carrying out a GPathFinder calculation. It is divided in four sections. As all the input/output files for each section are available here, you can follow the entire tutorial sequentially or you can choose one of the sections individually.
We propose the example of Acetylcholine bound to Acetylcholinesterase to study the possible unbinding routes of the ligand. The structure that is going to be used corresponds to the PDB code 2ace.
1. Preparing ligand and receptor .mol2 files
- Necessary files for this section: None
- Output files from this section: ligand.mol2, ligand_with_H.mol2, protein.mol2, protein_with_H.mol2
The first step is to obtain the complete structure of the system. It can be done by several manners, but we propose the following two options:
- Download the .pdb file from the Protein Data Bank. Option
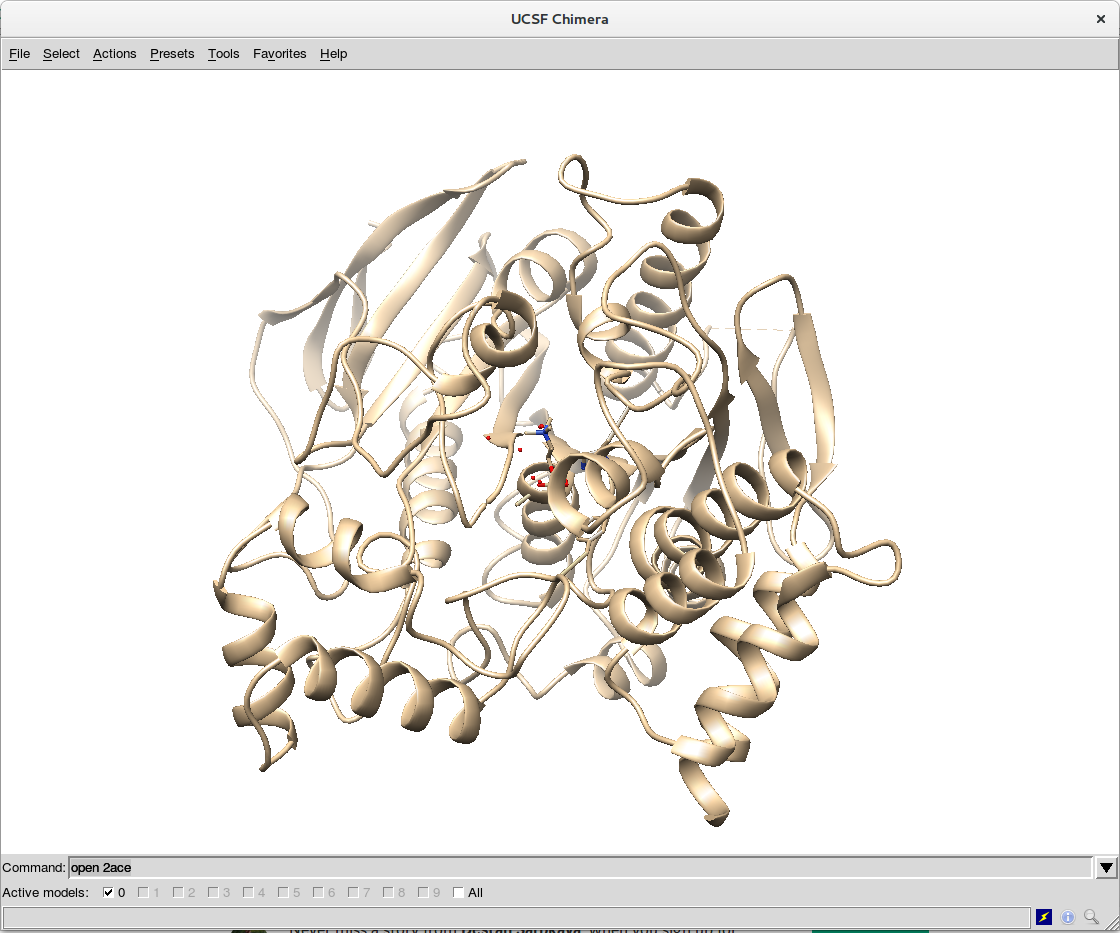
Download Files -> PDB Format. Open the downloaded file (2ace.pdb) with UCSF Chimera (you can use other visualization tool, of course). - Directly use UCSF Chimera and open the structure in the viewer with the command
open 2ace. You can open the command terminal of Chimera withFavorites -> Command Line.
Regardless of the option you choose, you will end up with the structure of 2ace in the viewer:
The next step is to clean up the system:
- Remove non essential small molecules. In this case, we remove all water molecules by the following Chimera command:
del :HOH - Remove alternative locations for residues (i.e. rotamers), if existing. In this case there are not such alternative locations, but it would be removed by the Chimera commands:
del @/altLoc=B,del @/altLoc=C, …
Then, you have to split the system into two different models. In Chimera, it can be done by the following steps:
- In the model panel (
Favorites -> Model Panel),copy/combinethe whole system to have two identical replicas. - Remove the receptor from the first model with command
del #0 & protein - Remove the ligand from the second model with command
del #1 & ligand
Save the ligand.mol2 and protein.mol2 files with File -> Save Mol2. You have to select model (#0) when saving the ligand and model (#1) for the protein. Make sure that Save relative to model: (#0) is marked to preserve coherent relative coordinates in both files. Save the files in a folder called mol_files inside a first_calculation folder:

If you want to optimize the solutions using only clashes, that would be enough. But if you want to add a Vina scoring criterium, files with explicit hydrogens are needed. To do so, you can add hydrogens in Chimera with Tools -> Structure Editing -> AddH. Once you have both models (ligand and protein) with hydrogens, you can save them as before using different names, for example ligand_with_H.mol2 and protein_with_H.mol2.
2. Preparing input.yaml file
- Necessary files for this section: ligand.mol2/ligand_with_H.mol2, protein.mol2/protein_with_H.mol2
- Output files from this section: input_clashes.yaml/input_clashes_vina.yaml
To prepare the configuration .yaml file, you have several templates available at Input files. Here, we are going to use either discover unbinding pathways with clashes evaluation or discover unbinding pathways with clashes+vina evaluation as base for our input configuration file.
Warning
Remember: if you are going to evaluate clashes+vina, the .mol2 files prepared in step 1 have to include explicit hydrogen atoms. For only clashes, without hydrogens would be enough.
You have to make the following changes/adjustements in your template file:
_path: input.yaml(or the name you choose for your configuration file)
ga section
generations: XXX(the values provided in the templates ensure good results for a general case, but you can adjust it to reduce the computation time)
genes section
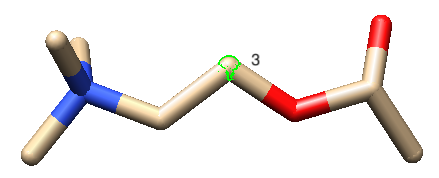
path: ./mol_files/ligand.mol2(path of your ligand .mol2 file)path: ./mol_files/protein.mol2(path of your protein .mol2 file)anchor: Ligand/3
Tip
To ensure that torsions of the dihedral angles in the ligand molecule are modified in a proper manner, we recommend to choose an anchor atom near the geometric center of the ligand. You have to indicate the name of the ligand gene and the Chimera serial number of the atom, in this case Ligand/3. To know the serial number, you can open in text mode the .mol2 file, or, visualize the property inside Chimera: select the atom and, then, show its serial number with Actions -> Label -> Other -> Label with attribute: serialNumber.
output section
name: 2ace(choose a name for your calculation)path: ./results_2ace(folder where the results of the calculation will be saved)
Finally, you have to save your .yaml inside your calculation folder, for example first_calculation.
3. Running the calculation
- Necessary files for this section: ligand.mol2/ligand_with_H.mol2, receptor.mol2/receptor_with_H.mol2, input_clashes.yaml/input_clashes_vina.yaml
- Output files from this section: folder with GPathFinder results
Running your calculation is as easy as open a terminal, activate your conda environment with:
conda activate name_of_the_environment
or
source activate name_of_the_environment
Go to your calculation folder, where input_clashes.yaml or input_clashes_vina.yaml is located, and run it with:
gpath run input_clashes.yaml
or
gpath run input_clashes_vina.yaml
4. Visualizing results
- Necessary files for this section: folder with GPathFinder results
- Output files from this section: None
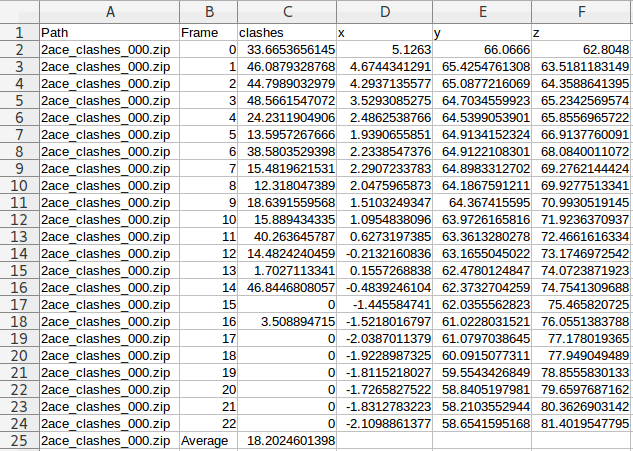
Inside the results folder you can find, among other files, a summary.csv file with an overview of the solutions that GPathFinder has obtained from your calculation. As any standard .csv file, you can open it with LibreOffice Calc, Microsoft Excel or any other editor you want.
For each solution, you will find the scoring (clashes, vina, etc.) and the coordinates of the ligand at every frame forming the (un)binding pathway. Moreover, the last line of every solution will be the average score for all the frames of the pathway. For example, the solution called “2ace_clashes_000” has 23 frames with a clashes average of 18.2 Å3:
The corresponding .zip file (in this case, 2ace_clashes_000.zip) contains the actual information about the solution. For a complete description of all the files, you can refer to the section Output files. Here we are centering on visualize the structures that form the (un)binding pathway. To do so, you have two possibilities:
- Open the
2ace_clashes_000.zip -> Pathway_000_Pathway.zip -> frame_XXX.pdbfiles directly with your favourite visualization tool (e.g. UCSF Chimera). They contain the structure of the receptor + ligand complex at every position (frame) of the (un)binding process, so you can choose the frames that you want and examine them individually. - Use the
Tools -> MD/Ensemble Analysis -> MD Moviein UCSF Chimera (select the PDB frames contained in multiple files option). It will open the frames that you select as a movie, so you can analyze the (un)binding process:
Whatever option you choose, you will end with the desired structure/s in your visualization tool, so you can use it for further analysis. If you want to deepen the analysis of GPathFinder solutions, you can follow the tutorial Analyzing GPathFinder results.